Saturday, September 30, 2006

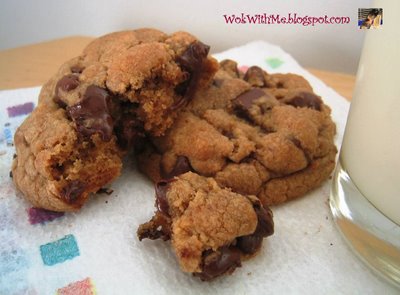
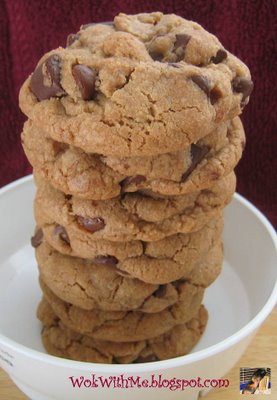
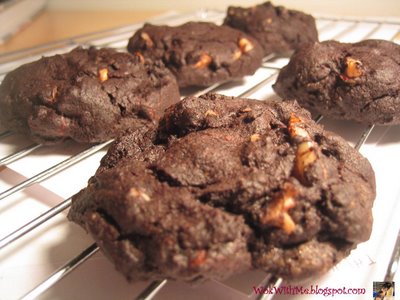
Double Chocolate Chip Cookies


I think this is the last recipe I'm going to try from Alice Medrich's book. I think I need to take a break from baking since I feel my arteries clogging up and my pants fitting a little too tight. I froze some of the dough for later use though!

Double Chocolate Chip Cookies
Alice Medrich

Ingredients:
1 cup all-purpose flour
1/2 unsweetened cocoa powder, dutch process
1/2 tsp baking soda
1/4 tsp baking powder
1/8 tsp salt
8 Tbsp unsalted butter, softened
1/2 cup granulate sugar
1/2 cup packed brown sugar
1 large egg
1 tsp vanilla extract
1/2 cup chopped walnuts
1/2 cup chocolate chips

Directions:
1. Preheat oven to 350 F. Position the racks in the upper and lower thirds of oven.
2. Combine flour, cocoa, baking soda, baking powder, and salt in a bowl and mix together. Set aside
3. Beat the butter, granulated sugar, and brown sugar with the back of the spoon or with a mixture until smooth and creamy but not fluffy. Mix in the egg and vamilla. Add the flour mixture and mix just until incorporated. Stir in the nuts and chocolate chips.
3. Scoop slightly rounded tablespoons of dough and place about 2 inches apart on cookie sheet. To bake later, form dough into an 11 by 1.75 inch log and wrap in foil. When ready, slice and place on cookie sheet. Bake 12 to 14 minutes, refrigerated dough may need an extra minute. Remove from oven and place on cooling rack immediately.

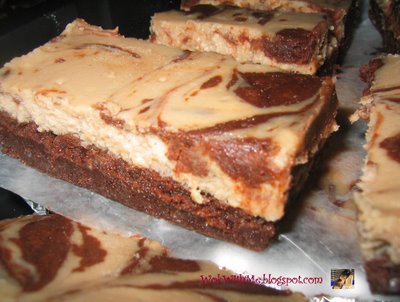
Espresso Swirl Brownies


You can probably tell I'm trying to get the best use of Alice Medrich's book before I have to return it. Here's another brownie recipe, based on the classic brownie recipe that I posted earlier.

Espresso Swirl Brownies
Alice Medrich

Ingredients:
Ingredients for classic brownie recipe without the nuts
1 Tbsp instant coffee or espresso powder
1 Tbsp water
8 ounces softened cream cheese
1/3 cup sugar
1 tsp vanilla extract
1 large egg

Directions:
1. Line a 9 inch square pan with foil or parchment paper. Preheat the oven to 350 F and position a rack in the lower third of the oven
2. Mix the batter for the Classic Brownies. Spread all but 1/2 cup of the batter in the pan. Set aside
3. Combine the coffee powder with water. Mix cream cheese with sugar and vanilla until smooth. Stir in the egg and the coffee mixture until well blended. Spread the cream cheese mixture over the batter in the pan. Spoon dollops of reserved brownie batter on top. Draw a knife through the dollops to swirl but do not scrape the bottom of the pan.
4. Bake 25 minutes and cool on rack. Refrigerate and chill thoroughly before cutting into 16 squares.

Friday, September 29, 2006

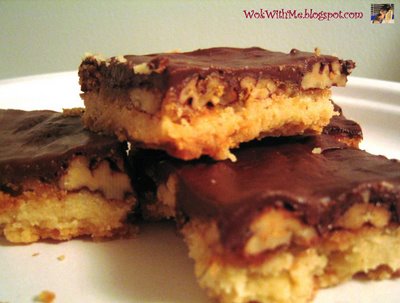
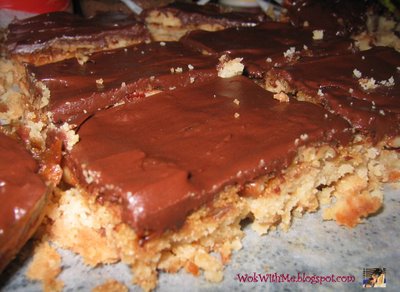
Turtle Bars


My copy of Alice Medrich's book is about to expire, so I've been trying a much as I can from her cookbook. Here's another one, called Turtle Bars, that are very very rich, sweet, and totally satisfying for a chocolate/nut/shortbread/caramel lover like me!

Turtle Bars
Alice Medrich's Cookies and Brownies
Ingredients:

Crust:
12 Tbsp butter
1/3 cup granulated sugar
1 tsp vanilla extract
1/4 tsp salt
2 cups all-purpose flour
2 cups pecan halves

Topping:
8 Tbsp butter
3/4 packed light brown sugar, lump free
1 cup milk chocholate chips or 6 ounces milk chocolate, chopped

Direction:
1. Line a 13 by 9 inch pan with foil on all 4 sides. Preheat oven to 350 F. Position a rack in the lower third of oven.
2. For crust: melt butter in a large sauepan oer medium heat. Remove from heat and add sugar, vanilla, and salt. Gently mix in the flour until just incorporated. Press the dough evenly over the bottom of the pan. Scatter the pecans over the dough
3. Bake 10 to 12 minutes until pecans are lightly toasted
4. For topping: combine the butter and brown sugar in a small saucepan. Bring mixture to a boil oer medium heat, stirring ocasionally. Boil for 1 minuted and pour mixture over pecans on the crust. Bake for 15 to 18 minutes, or until the topping is dark and bubbling.
5. Remove pan from oven and scatter chocolate chips over it. Let sit for a few minutes to melt the chocolate before using a knife to spread the chocolates evenly over surface. Cool the bars in the pan on a rack. Cut into 24 bars when cooled.

Lemon Bars


Another great treat from Alice Medrich. Very tart yet sweet and totally addicting.

Recipe:
From Alice Medrich's Cookies and Brownies:

Ingredients:
Crust:
8 Tbsp butter
1/4 cup granulated sugar
3/4 tsp vanilla extract
1/8 tsp salt
1 cup all-purpose flour

Topping:
1 cup plus 2 Tbsp sugar
3 Tbsp all-purpose flour
3 large eggs
1.5 tsp finely grated lemon zest
1/2 cup strained fresh lemon juice
2 to 3 Tbsp powdered sugar for dusting

Directions:
1. Line an 8-inch square pan with foil on all 4 sides. Preheat oven to 350 F. Position a rack in the lower third of oven
2. For crust: melt butter in medium saucepan. Remove from heat and stir in sugar, vanilla, and salt. Add the flour and mix just until incorporated. Press the dough evenly over the bottom of the pan. Bake for 25 to 30 minutes, or until the crust is well browned at the edges and lightly browned in center.
3. For topping: while the crust is baking, stir together the sugar and flour in a medium bowl until wel mixed. Whisk in the eggs. Stir in the lemon zest and juice. When crust is ready, turn the oven down to 300 F and slide the rack out without removing the pan. Pour filling over hot crust.
4. Bake 20 to 25 minutes or until the topping is pufed at the eges and no longer jiggles in the center when pan is tapped. Set on a rack and cool completely in pan. When cooled, lift the foil liner and transfer to cutting board and cut into 16 bars. Sieve powdered sugar oer bars just before serving.

Monday, September 25, 2006

mapo tofu


So many different versions for this spicy tofu dish made famous in Sichuan. I've tried about 5 different versions from all sorts of sources and I like the one by Fuchsia Dunlop in Land of Plenty best. I used slightly less chili bean sauce than what she suggested because I was afraid it'd be too spicy for me. It ended up being just right for my taste so maybe if I get adventurous next time I'll follow the recipe exactly. Below is her original recipe:

MaPo tofu:
From Fuchsia Dunlop's Land of Plenty

Ingredients:
1 block bean curd (around 16 oz)
4 baby leeks or green onion
1/2 cup peanut oil
6 ounces ground beef
2.5 Tbsp chili bean paste
1 Tbsp fermented black beans
2 tsp ground Sichuanese chiles (optional)
1 cup stock
1 tsp white sugar
2 tsp light soy sauce
4 Tbsp cornstarch mixed with 6 Tbsp cold water (I use a lot less!)
1/2 tsp roasted Sichuan pepper

Directions:
1. Cut the bean curd into 1 inch cubes and blanch in hot water. Slice the leeks or green onion into thin slices
2. Heat the wok, add oil, then brown the beef.
3. Turn down the heat to medium, add the chili bean paste and stir fry until fragrant. Add the black beans and chilis and stiry fry for 20-30 seconds.
4. Pour in the stock, and add the drained bean curd. Gently mix so to not break up the curd. Season with sugar, soysauce, and salt to taste. Simmer for 5 minutes until bean curd has absorbed the flavor.
5. Add the leeks or scallions and gently stir in. Add the cornstarch mixture, a little at a time, until the sauce as just thickened . You probably will not need all. Pour everything into a bowl and scatter with the ground Sichuan pepper

Friday, September 22, 2006

Alice Medrich's Classic Brownies


I so wish I could own a copy of Cookies and Brownies by Alice Medrich. For $80.00 for a 120 page book, however, coupled with my meager income as a graduate student, makes it very hard for me to shell out this much money. Instead I was lucky enough to grab a copy from the library, so for the next 3 weeks, I hope to certainly take advantage of this! Her technique of making the brownies, called the "steve's ritual" which involves baking at a high temperature for 20 minutes and then plunging it into a cold environment such as the freezer or pan filled with ice water, results in the best brownies ever! Usually I'm not overly fond of brownies because they're either too sweet, too dry, too soft and unable to hold their shape, too chewy, etc. But these were perfect by my standards! A slightly crispy and crunchy crust with the absolutely most smooth, creamy interior! I can't wait to make them again! But be warned, they are dangerously addictive and it's very easy to eat the whole pan if you're not careful!

Classic Brownies
Adapted from Alice Medrich's Cookies and Brownies

Ingredients:
8 Tablespoons unsalted butter (1/2 cup)
4 ounces unsweetened chocolate
1.25 cups sugar
1 tsp vanilla extract
1/4 tsp salt
2 large eggs
1/2 cup all-purpose flour
2/3 cup walnuts or pecan pieces (optional) <--I left this out

Directions:
1. Preheat oven to 400 F
2. Melt butter and chocolate. Stir in sugar, vanilla, and salt. Add the eggs, one at a time. Stir in the flour and beat with a wooden spoon until the batter is smooth and glossy, about 1 minute. Add in the nuts if using. Scrape the batter into an 8X8 metal pan that's been lined with foil.
3. Bake for 20 mminutes. Meanwhile, fill a roasting pan or large baking pan with ice ubes and water. When brownies are ready, remove pan from oven ad plunge it into the ice bath. Let sit until cool before cutting it into 16 pieces

*note*
I do not keep ice aroud so I stuck it into the freezer and it cooled in about 20 minutes. Also, I cut it into 12, not 16 pieces :)

Sunday, September 17, 2006

Chocholate Chip Cookies with a Chewy Center


Years ago I attempted to find the best chocolate chip recipe, scouring dozens of cookbook, websites, and going through numerous batches of dough hoping that I would proclaim one as "the one!"

Unfortunately I've since given up.

Not there there's not many excellent recipes out there, but because well, my idea of what makes a good chocolate chip recipe "the one" seems to change depending on my mood, the weather, who I'm eating it with, and whether I'm eating it by itself or with a cool glass of milk. Obviously the changing criteria made my quest for the perfect chocolate chip cookie impossible.

Instead I have a collection of recipes that I go to, labeled under categories such as : chewy, crunchy, fat, flat, gooey, cake-like, crispy, etc. Unfortunately I can't have it all but at least I know which ones to make to satisfy whatever type of cookie perfection I'm craving that moment.

Today was a chewy chocolate chip cookie, which I got from Allrecipes, labeled under Best Big, Fat, Chewy Chocolate Chip Cookie I refrigerated the dough overnight and baked it the next morning, since I read from Alice Medrich's Cookies and Brownies that letting the dough sit overnight improves the flavor (can't wait to try her recipes by the way....will hopefully post soon). I've made this cookie without refrigerating them and I have to agree that there's a slightly more complex flavor and chewier texture after refrigeration. Of course, everything tastes better first thing in the morning so maybe my judgement was biased. Either way, if chewy chocolate chip cookies are what you're craving, then here you go:

Chewy Chocolate Chip Cookies
Adapted from Allrecipes

Ingredients:
2 cups all-purpose flour
1/2 teaspoon baking soda
1/2 teaspoon salt
3/4 cup unsalted butter, melted
1 cup packed brown sugar
1/2 cup white sugar
1 tablespoon vanilla extract
1 egg
1 egg yolk
2 cups semisweet chocolate chips

Directions:
1. Preheat the oven to 325 degrees F (165 degrees C). Grease cookie sheets or line with parchment paper.
2. Sift together the flour, baking soda and salt; set aside.
3. In a medium bowl, cream together the melted butter, brown sugar and white sugar until well blended. Beat in the vanilla, egg, and egg yolk until light and creamy. Mix in the sifted ingredients until just blended. Stir in the chocolate chips by hand using a wooden spoon. Drop cookie dough 1/4 cup at a time onto the prepared cookie sheets. Cookies should be about 3 inches apart.
4. Bake for 15 to 17 minutes in the preheated oven, or until the edges are lightly toasted. Cool on baking sheets for a few minutes before transferring to wire racks to cool completely.

*note: I set the oven to 340 F just because my cookies were slightly smaller*

Saturday, September 16, 2006

My BBM Package!!!!


So I was sitting in front of my laptop working on a presentation I have to give later the week when my doorbell buzzer rang.
"I have a couple of packages for you, ma'am" says the postal guy
"A couple?" I thought? I'm only expecting 1 package from my fiance. I open the door and I see a huge box, with legs sticking out under it. See, the box was so big I couldn't even see the mail man's head!
"BBM! I said outloud!" I grabbed the stuff from the mail man and immediately grab a knife to cut open the package. Whatever in this box was certainly heavy! (Poor mail man, he had to walk up 3 flights of stairs to get to my apartment!)
Indeed, it was from Faith at from www.mekuno.net

Either I was too eager to rip open the package that my fingers were too fumbly, or Faith has a degree in wrapping up packages because it took me quite a while to get through the tape :) Ooooh, but whatever was in the box smelled soooo good! I could tell it was something slightly nutty, sweet and sugary just by the whiffs I got as I tried to tear open the box. Finally! I got it open and you can see how well faith packaged it up with care!
There were soooo many goodies in there! Here's a pic of some of the stuff she sent:


The first thing I saw (and ate!) were These monster cookies
They were sooooo good! How did she know I love the combination of oatmeal, peanut butter, and chocolates? After quickly eating 1, I grabbed another and dangled it in my mouth as I fervently opened up the rest of the goodies. I saw a wooden box with a few cans in it. Quickly, I lifted out the heavy box (my workout for the day to compensate for all the goodies I ate later!) and found homemade strawberry jam, muscadine jam (never tried that! Can't wait to put it on toast tomorrow morning!), garam masala blend, chai tea mix, garbanzo beans, and a cute little strainer! Each item had its own little ID tag with instructions too! What a great idea! I'm sure this must've taken a lot of time to do!
But that's not all....
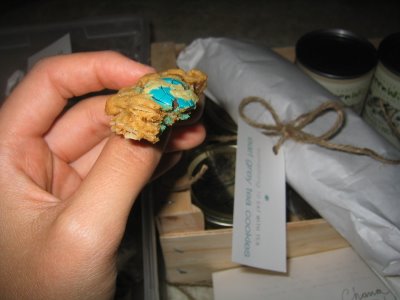
In a separate tub, there were more homemade goodies! I opened it up and found a roll of earl grey tea cookies! I've never tried it before but they looked so pretty I had to quickly finish the dangling cookie from my mouth and try one. Trust me, they are dangerously addictive. Addictive because I did not stop at one. I won't mention how many I had b/c Faith might think I'm a pig when she reads this :) She was too sweet and also baked a coconut bread for my Fiance! Luckily I'm going to go visit him in 2 days so I'll bring the bread to him! I know he'll love it! (Good thing faith wrote, "to your fiance" on the tag or else I'd probably would have ate my way through that before I thought about sharing!"
She also made some candied pecans, following my recipe for candied walnuts! Wow! Hers were sooo good! (Yes! Of course I tried like, 4 pieces, waaayy too addicting as well!) She added some extra spices that gave it a spicyish kick to it. Very nice, I'll have to try adding some spices next time!
Just when I thought I found everything....

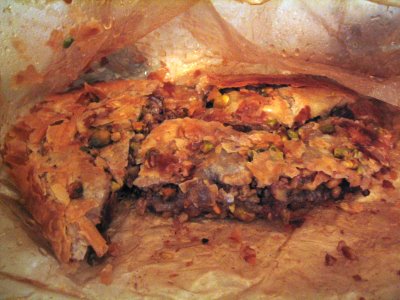
Baklava!!!!!
I haven't had baklava in the longest time but they were sooo good! Yeah, if you look at the picture you'll see the many missing pieces...that...I...ate....Faith must've known my love of nuts because she included walnuts and pistachios and many other yummy flavorings!
Thanks so much Faith!

Friday, September 15, 2006

Honey Coconut Walnut Shrimp


One of my favorites to eat at a Chinese restaurant! Okay, before I go duck for cover from all the people yelling, "that's not chinese!" I'll come out and say that I'm aware that it's probably a westernized dish, however, as long as it tastes good, looks appealing, and smells amazing, then I'm all for it! Shrimps are first lightly battered then deep fried till cripsy. Then quickly mixed with a sweet, coconut flavored sauce, accentuated with a sprinkling of glazed
walnuts
. A little bit of mayo mixed with coconut milk provides a smooth yet fragrant sauce, sweetened with a dollop of honey. This is my own recipe that I've been using for a while. Feel free to add more or less flavoring to your liking

Recipe:
1/2 pound shrimp, peeled and deveined
1 Tbsp wine
1 Tbsp cornstarch

batter:
1 egg
1/2 cup tapioca starch
1 tsp salt

Sauce:
3 Tbsp coconut milk
3 Tbsp mayo
1 Tbsp lemon juice
2-3 Tbsp honey
handful of glazed walnuts

Directions:
1. Wash and dry shrimp thoroughly. Then mix with the wine and cornstarch and leave aside while preparing the rest of the ingredients.
2. Beat the egg with the starch and salt. Add enough cold water to form a smooth but slightly thick batter. Heat enough oil for deep frying to 350 F. Using chopsticks, dip each shrimp in the batter, then fry in the hot oil for a few minutes until golden and crispy. Drain on paper towels.
3. While the shrimps are frying, mix the sauce ingredients in a saucepan. After the shrimps are all done frying, place the shrimp on a plate and pour the sauce over. Sprinkle with the walnuts.

Tuesday, September 12, 2006

Presto Pesto!


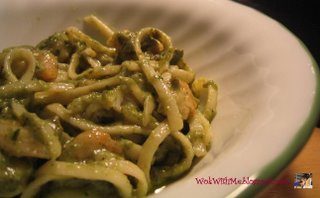
Growing up I never understood what all the hype was about pesto. I saw it all the time on the menus at restaurants, and saw many chefs on Food Network like Rachel Ray and Giada whizz it up in the blender, but I never thought I would like this Italian concoction. It sounds almost too simple to be good: basil, olive oil, garlic, parmesan, nuts, and a little lemon juice to keep the color a vibrant green. Where was the tomato or alfredo sauce that I was more accustomed to? Well after trying it for the first time in a pasta dish a few years ago at the Cheesecake factory, I instantly fell in love with it. Sure it left a huge puddle of greenish tinted olive oil at the bottom of the plate but it was an incredibly heavenly tasting puddle of grease, excellent for bread dipping! The above picture is my own rendition of the pesto pasta, using liguine, shrimp, cream, and of course, pesto! I didn't measure everything exactly, and I used a lot more pine nuts than what most recipes use, but I thought it suited me well since I love pine nuts. Enjoy!


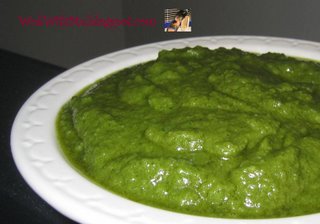
Pesto sauce

Ingredients:
3 cups basil
3/4 cup toasted pine nuts
3/4 cup grated parmesan cheese
3/4 cup olive oil
3 cloves garlic, crushed
1 tsp lemon juice
salt to taste

Directions:
Place everything except salt and olive oil in the blender. Turn the blender on and gently pour in oil until the desired thickness is reached. You may not need all the olive oil. Add salt to taste.

Saturday, September 09, 2006

Chicken, chinese pancakes, and a griddle


I don't drink beer or soda, but I happened to have a can of soda that I took from a meeting with the intent on making this chicken. The orignal name for this chicken is "beer-butt chicken", which I got from allrecipes. Instead of beer, I emptied out a sprite can and filled it about halfway full with cooking wine instead. The moisture from the liquid in the can provides a source of steam to keep the inside of the chicken moist. I rubbed the outside with a mixture of salt, black pepper, cayenne pepper, and paprika. Then I rubbed some olive oil on the outside just before baking. I baked it for 1.5 hour at 300 F, then turned up the heat to 400 for the last 30 minutes to crisp the outside.


So how did I serve this chicken? I made some asian lotus-style pancakes, meaning that 2 pieces of dough are sandwhiched together prior to rolling, then peeled apart after cooking. This was a fairly basic recipe: using 2 cups of bread flour and slightly less than 1 cup hot water. Mix and knead well, then let it rest for 30 minutes before cutting and rolling. Fiance and I wrapped these pancakes with the chicken, cucumbers, hoisin sauce, and some fried eggs. I didn't manage to snap a shot of this assembly, but it was quite good.


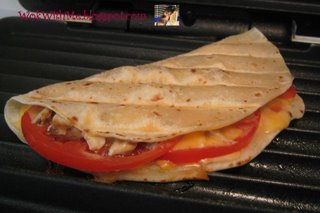
After a few days, I got quite tired of eating the same wrap and was getting quite desperate to finish the chicken and pancakes. I decided to use my griddle and make a different version, with chicken, tomatoes, and cheese. Now I'm finally finished with the chicken! I still have about 3 pancakes left but I stuck that in my freezer as I'm a little tired of eating that!

Friday, September 08, 2006

Sesame balls with black sesame paste


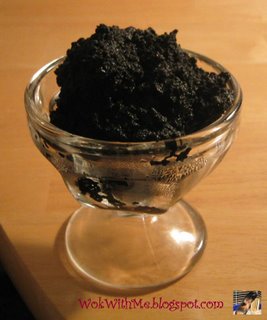
These deep fried sesame balls are a common staple in Chinatown and in Dim Sum restaurants. Now, when made and fried correctly, they're suppose to have a crisp outer shell that protects the sweet, chewy skin. The skin encloses a pleasantly sweet suprise, usually made of red beans. I was really craving these so I set out to fry my own tonight (what better way to spend a friday night than to deep fry in your kitchen anyway!) Wanting to try out the black sesame version that TT shared in Jo's blog, I ventured out to the store to buy some black sesame seeds. Now, I had to modify TT's recipe a bit since I couldn't find the pre-ground kind, but I'm sure it should be similar tastewise. After making the dough, shaping, rolling them in white sesame seeds, and finally frying, I was a little dissapointed with the outcome. As you can see in the picture, most of the sesame seeds came off during the frying process! Also, the balls did not expand evenly even though I tried to apply pressure to all sides of the ball as it was frying. Tastewise, I thought it was alright, I mean, I achieved the marriage of crisp and chewy, however, just was not as picture perfect like those sold in restaurants. I'll keep experimenting, but if anyone has had success, please share because I definately want to try again!

Here's TT's recipe for the black sesame paste:
200 grams black sesame powder
150-200 grams sugar
150 grams water
3 tbs oil
1 tbs koh fun

Direction:
1. Mix the water with the powder and let sit until it has absorbed the liquid
2. Stir fry the powder solution with sugar for 10-15 minutes. Add in the rest of the ingredients until the consistency is as thick as you want it

Tuesday, September 05, 2006

Mailing Sweet Treats

I'm so excited to participate in my first Blogging By Mail, hosted by Stephanie. There were so many wonderful desserts I wanted to bake for my Blog Pal over at ourfullhouse.blogspot.com, however, I had to decide which one would ship well. Unfortunately this meant that I couldn't bake some of my favorites to share, such as lemon bars, pies, cheesecakes, and custards. I also didn't want to get too adventurous with my creations as I sometimes do when I get too overly ambitious, so I settled for some tried and true goodies that I hoped will ship well!

Magic Bars

I'm not even sure where I got the original recipe for these decadent cookie bars because I've been making these for ages. I think I might've gotten it from the back of a can of sweetened condensed milk at one point. Anyway, these are very simple to make and tastes really addictingly good! A generally add more than one type of nuts since I'm a huge nut fan, but the recipe is quite versatile so don't feel confined to exactly what's listed!

Magic Bars
Ingredients:
1/2 cup butter
2 cups graham cracker, crushed
1 can sweetened condensed milk (14 oz)
2 cup chocolate chips
1 cup dessicated coconut
1 cup chopped walnuts
1/2 cup jam any flavor

Direction:
1. Preheat oven to 350 F and place pan in oven. Melt butter in the pan, and sprinkle cracker crumbs into pan.
2. Spread on the milk, and sprinkle on the remaining ingredients except for the jam. Press lightly so ingredients adhere to the base
3. Microwave the jam until liquidified (about 45 seconds). Drizzle over the mixture
4 Bake for 30 minutes and cool completely before cutting

Next,
Marbled Brownies:
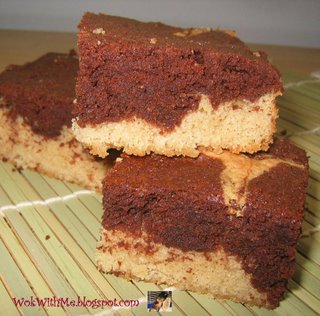

Recipe for Marbled Brownies
Ingredients:
1 cup unsalted butter
1.75 cups sugar
1/2 cup brown sugar
4 eggs
1 tsp vanilla
1.25 cup flour
1/2 tsp salt
4 ounces unsweetened chocolate
Directions:
1. Line a 9 by 13 inch pan with foil. Preheat oven to 350 F
2. Cream butter until soft. Add sugar, eggs and vanilla. Still in flour and salt
3. Microwave the chocolate until melted.
4. Pour half of the mixture in step 2 in the pan. Mix the melted chocolate with the remaining matter and spoon over the white mixture. Use a fork to create a marbelized effect.
5. Bake for 25-30 minutes and stick in freezer immediately afterwards. Slice when cooled

Last up,
Peanut Butter Oatmeal cookie sandwhiches with Nutella Filling:
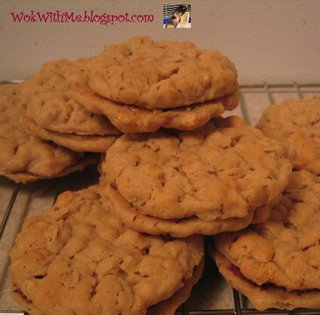


This cookie combines almost all of my food-love interest into one incredible bite: the crunchiness of the peanuts, the extra body of the oatmeal, and the sweet and creamy chocolate flavor of the nutella.

Recipe:
Ingredients:
3/4 cup flour
1/2 tsp baking soda
1/2 tsp baking powder
1/2 tsp salt
1/2 cup butter
1/2 cup peanut butter
1/2 cup sugar
1/2 cup light brown sugar
1 egg
1 tsp vanilla
1 cup oats
1/4 cup nutella
Directions:
1. Cream together the butter, peanut butter, sugar and vanilla. Mix in the egg
2. Combine the flour, baking soda, baking powder and salt in a separate bowl. Add to the mixture 1 and stir in oatmeal
3. Preheat the oven to 350 F. Line a baking sheet with parchment paper, and with slightly wet hands, roll a piece of dough into a round shape. Use the back of a fork to make a criss cross pattern. You should get around 26-32 cookies, depending on how big you want your "sandwhiches"
4. Bake for 10 minutes. Remove and cool on a cooling rack. Once cooled, spread nutella on the back of the cookies and sandwhich them together.
Monday, September 04, 2006

Char Siu Pastry


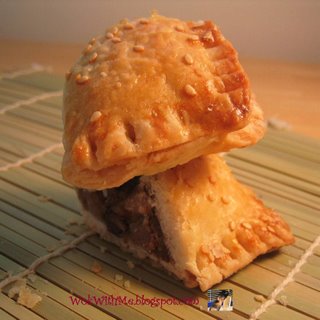
The Chinese 2 layer flaky pastry is so versatile! I use it to make the skin for egg tarts, flaky red bean filled desserts, and now, the savory meat filled char siu pastries. I used the Lee Kum Kee brand of Char Siu sauce that the local asian mart sells in a bottle and use that to marinate a slab of pork shoulder. I then bake that in a 400 degree oven until done, and heat up my broiler briefly to give it the characteristic charred (read: carcinogenic) appeal. The meat tastes great right out of the oven, and if there's any left over, dice it up into small cubes and use it as a filling for these! My recipe for the flaky skin can be found from many of my previous post. After filling them up with the filling, brush with egg glaze, sprinkle sesame seeds over it, and bake in a 400 degree oven for 25 minutes.

Filling for Char Siu Pastry
Adapted From Dim Sum, by Ellen Blonder

Ingredients:
2 teaspoon oil
1 small onion, finely chopped
1 Tablespoon sugar
1/2 teaspoon soy sauce
1 teaspoon oyster sauce
1 Tablespoon hoisin sauce
1/2 teaspoon sesame oil
1 teaspoon cornstarch dissolved in 1 tablespoon water
4 ounces Char Siu

Direction:
1. Heat a skilled and add the oil. Stir fry onion until transparent.
2. In a bowl, mix the sugar, soy sauce, oyster sauce, hoisin sauce, and sesame oil. Add 2 Tablespoon or so of water until mixture is even. Pour into the pan and heat for 30 seconds until bubbly.
3. Add the cornstarch mixture and cook until sauce has thickened. Add the char siu and remove from heat. Cool to room temperature before using it as a filling.

Strawberry Pie


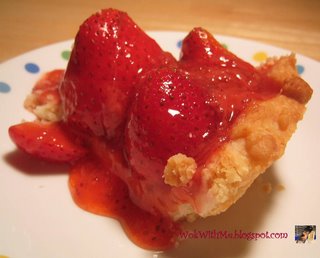
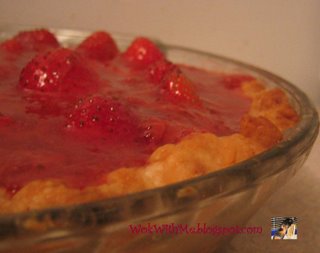
Although strawberries are sold year around at the grocery store, they are especially sweet and juicy this time of the year. To take advantage of their ripeness, fiance and I decided to make a strawberry pie. I'm a huge pie lover in general because I love the flaky, buttery, heart attack inducing crust, but I especially love strawberry pie because the summery, fresh taste of the strawberries pairs very well and lightens up the delicate richness of the crust. In this recipe, half of the strawberries are mashed and cooked up to produce a syrup which is then poured over the remaining fresh strawberries arranged in a pre-cooked pie shell. I adapted this recipe from Allrecipes, but I substituted cornstarch for tapioca starch since cornstarch produces a cloudier syrup which leaves a pink glaze over the pie, whereas tapioca starch is clear when cooked and results in a clear, red glaze.

Recipe:
Adapted from Allrecipes

1 recipe for 9 inch pie shell, baked and cooled (see below for mine)
1.5 pounds of fresh strawberries
1/2 cup sugar
2 Tablespoon tapioca starch
2/3 cup water

Direction:
1. Wash, hull, and dry strawberries. Separate the prettier ones from the too overripe/underripe/ugly ones, and place the prettier ones in a single layer in the pie shell, pointy side facing up.
2. In a saucepan over medium heat, mash the remaining strawberries with the sugar. Cook until bubbly and liquidy.
3. Dissolve the tapioca starch with water and gently whisk into pan.
4. Turn the heat to high, and stir a few minutes until bubbly and thickened. Remove and set aside to cool.
5. Once cooled, pour over the pie and let sit in refrigerator for a few hours until chilled.

Recipe for pie crust:
Ingredients:
1.25 cup flour
1/2 cup shortening
2 Tablespoon butter
2-4 Tablespoon ice water

Directions:
1. In a bowl, cut shortening and butter into flour mixture. Gradually add the water, a few drops at a time, until the mixture can be held together when squeezed.
2. Wrap in saran wrap and press into a flat disc. Refrigerate 20 minutes
3. Roll between 2 wax sheets until the dough is about 12 inches in diameter. Place over 9 inch pie plate. Trim the edges and pleat if desired
4. Cover with foil and weights (such as rice or dry beans). Bake in 400 F preheated oven for 20 minutes. Remove the foil and weights and bake until golden brown, about 8 more minutes