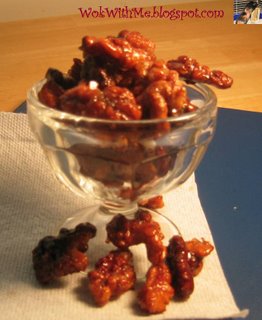
I love nuts. Plain and simple. People who don't share my nut-loving craze don't understand why I top my morning oatmeal with nuts, or why I have to have extra nuts in my cookie, or why my create-my-own ice cream sundae is pretty much a scoop of ice cream swimming in (and sometimes lost) in mounds of cruchy and flavorful nuts.
If you love nuts as much as I do, then for sure you've tried candied nuts, especially during the holidays when they find their way onto an appetizer tray at many family gatherings and social parties. I've bought some at a local store a while back, and they were a huge dissapointment; overly sweet, grainy, and stale nuts that must've been sitting in that container for ages. Specialty stores sell good ones, as I've been known to go in and ask for samples, trying to look like I'm seriously going to consider spending $15.99 on a pound of their candied walnuts. Making your own is very easy and only took me 30 minutes from opening a bag of raw walnuts to cleaning up my oil pan. The only drawback is that you must wait until they cool or else you're gonna end up with a burnt tongue! When cooled (or slightly warm if you can't wait!) these walnuts have a delicately sweet outer crust, with a crunchy and toasty and well, walnutty treat inside!
Recipe:
Ingredients:
8 oz walnuts
1/3 cup sugar
oil for deep frying
Direction:
1. Bring a big pot of water to a boil. Drop the walnuts in there to clean them of their color and rid them of excess skin. Meanwhile, heat up a small pot of oil for deep frying
2. Once walnuts are cleaned (1 minute max should do), drain them and wash them throroughly (or else nuts will appear too dark after frying). Return to the pot and stir in the sugar until dissolved. If sugar is not quite dissolved, turn on the heat and let the nuts and sugar warm up until the sugar coats the nuts.
3. Once oil reaches 325 F, drop in a few spoonfuls at a time. The nuts should take about 2-3 minutes to cook, so adjust the temperature accordingly. It's better to start with a slightly lower temperature and crank up the heat later than it is to end up with burnt nuts :) Once they are done the sugar should form a clear shell and be a shiny brown color
4. Drain them and place on a baking sheet to cool. Repeat with remaining nuts.


1 comment:
Nice blog, love the rabbit and penguin mooncakes haha. There's some occasional baking stuff on my blog from my co-blogger, so you might want to check it out. The rest is mainly food reviews and the VERY rare cooking stuff from myself.
Cheers.
Post a Comment