Wednesday, August 30, 2006

Glazed (Candied) Walnuts


I love nuts. Plain and simple. People who don't share my nut-loving craze don't understand why I top my morning oatmeal with nuts, or why I have to have extra nuts in my cookie, or why my create-my-own ice cream sundae is pretty much a scoop of ice cream swimming in (and sometimes lost) in mounds of cruchy and flavorful nuts.
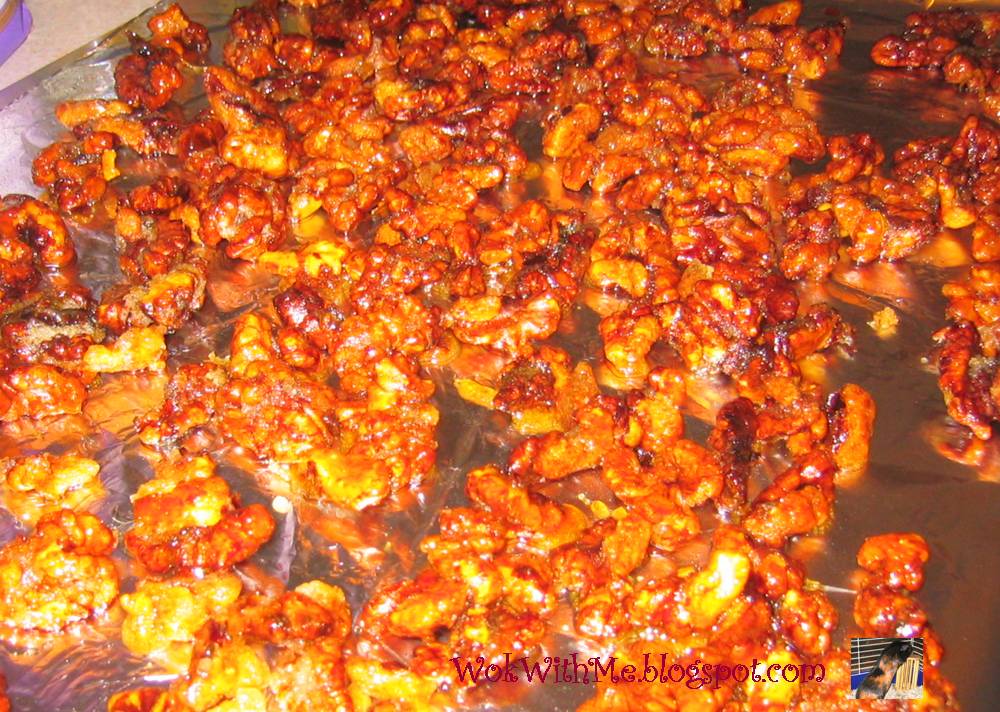
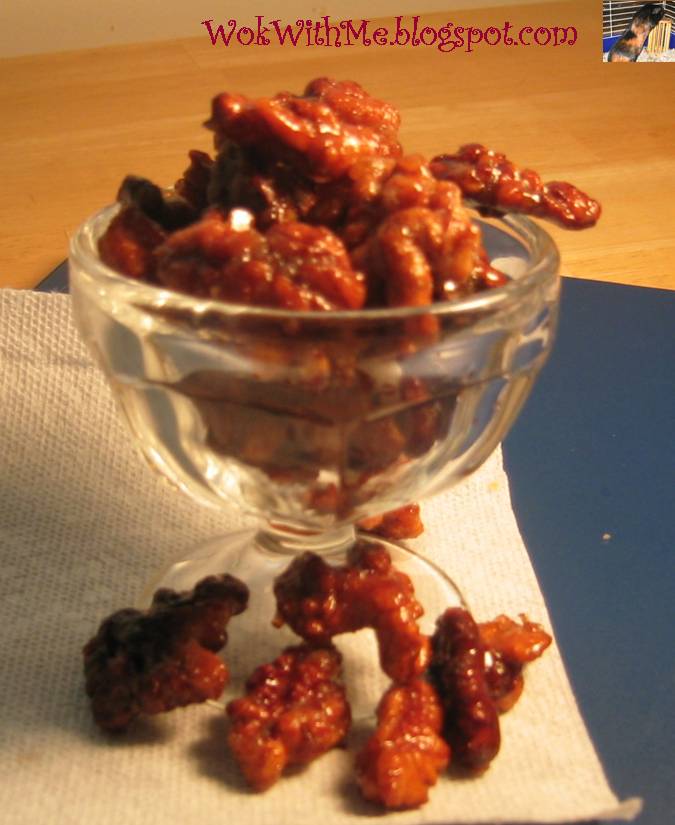
If you love nuts as much as I do, then for sure you've tried candied nuts, especially during the holidays when they find their way onto an appetizer tray at many family gatherings and social parties. I've bought some at a local store a while back, and they were a huge dissapointment; overly sweet, grainy, and stale nuts that must've been sitting in that container for ages. Specialty stores sell good ones, as I've been known to go in and ask for samples, trying to look like I'm seriously going to consider spending $15.99 on a pound of their candied walnuts. Making your own is very easy and only took me 30 minutes from opening a bag of raw walnuts to cleaning up my oil pan. The only drawback is that you must wait until they cool or else you're gonna end up with a burnt tongue! When cooled (or slightly warm if you can't wait!) these walnuts have a delicately sweet outer crust, with a crunchy and toasty and well, walnutty treat inside!

Recipe:
Ingredients:
8 oz walnuts
1/3 cup sugar
oil for deep frying

Direction:
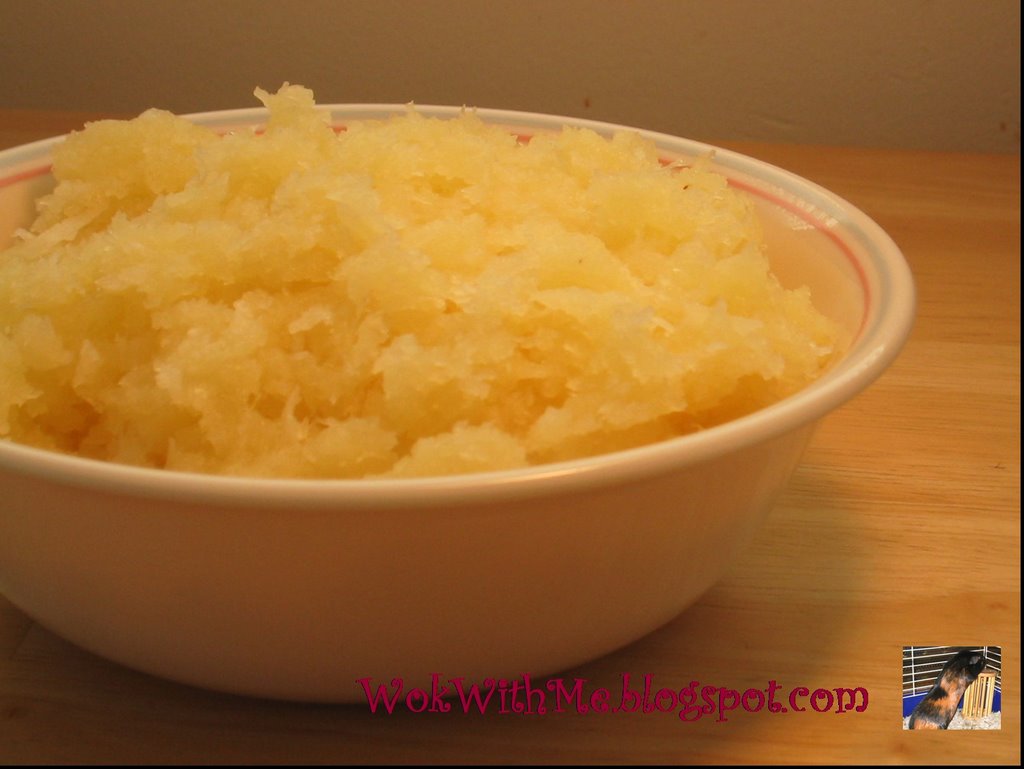
1. Bring a big pot of water to a boil. Drop the walnuts in there to clean them of their color and rid them of excess skin. Meanwhile, heat up a small pot of oil for deep frying
2. Once walnuts are cleaned (1 minute max should do), drain them and wash them throroughly (or else nuts will appear too dark after frying). Return to the pot and stir in the sugar until dissolved. If sugar is not quite dissolved, turn on the heat and let the nuts and sugar warm up until the sugar coats the nuts.
3. Once oil reaches 325 F, drop in a few spoonfuls at a time. The nuts should take about 2-3 minutes to cook, so adjust the temperature accordingly. It's better to start with a slightly lower temperature and crank up the heat later than it is to end up with burnt nuts :) Once they are done the sugar should form a clear shell and be a shiny brown color
4. Drain them and place on a baking sheet to cool. Repeat with remaining nuts.

Sunday, August 27, 2006

Coconut Filled Animal Mooncake


Since this food blog started 2 months ago, I think about a fourth of my post have been about mooncakes! Okay, so I'll try to be a little more diverse from now on, but I just had to make another round of mooncakes! My fiance really likes coconut flavored treats, and I've been searching high and low for coconut filled mooncakes. I was inspired after browsing through Kuali, however, did not have some of their ingredients, so I experimented by substituting some of the missing elements and also changed the proportions quite a bit according to what I liked. Afterwards, it became quite a different recipe, but I think it turned out quite well! The cute animal shaped mooncakes were inspired by Yochana, who posted her beautifully decorated pigs on Jo's website! (Hers are way more pretty and elaborate than mine!) I also feel bad eating them because I got quite attached to them while making them, but better to get eaten than to get old and moldy later on! The recipe below is for the filling, which made enough for 25 mini mooncakes.

Coconut Filling
Ingredients:
150 grams Desiccated coconut
75 grams sugar
100 mL water
100 mL coconut milk
30 grams cornstarch
2 egg yolks
3 Tablespoon butter

Directions:
1. Heat water and sugar in a small pan until sugar is dissolved
2. Stir in the remaining ingredients, making sure to gently incorporate the eggs to avoid scrambling the yolks
3. Stir on medium/low heat for 15-20 minutes. Chill well before shaping into balls for mooncake filling

Tuesday, August 22, 2006

glutinous rice cupcakes with red bean paste filling


Glutinous rice is such a wonderful gift! Although it looks like regular white rice, when cooked, the kernels stick together and produces a wonderfully fragrant aroma. Glutinous rice flour is the finely ground up version of glutinous rice, which makes for wonderful desserts with a chewy, sticky, and just simply enjoyable bite. Although the word "cake" is used in this name, the result is not the fluffy, soft texture found in cakes using all purpose flour. Maybe my limited vocabulary keeps me from fully describing the unique texture and flavor of this cake. Try it for yourself and then tell me how you would describe it!
This recipe was originally used to make a rectangular pan (9 by 13 inches) of glutinous rice cake, but I got creative and baked them in muffin cups and hid a dollop of a sweet suprise inside.

Ingredients:
2 egg
1 bag (10oz) glutinous rice flour
1 cup sugar
2 teaspoon baking powder
3/4 cup oil
2.5 cup milk

Directions:
1. Preheat oven to 375 F
2. Mix all ingredients until smooth.
3. Pour into a 9x13inch pan
4. Bake 35 minutes

Note, for the cupcakes, fill each cup until 1/2 full. Then place a flattened piece of red bean paste and cover the top with more batter. Reduce baking time to about 20 minutes. Make sure to use a nonstick pan, or spray liberally with cooking oil or else the cupcake will get stuck when you remove them! (which is fine with me because then I take a big spoon and pry it out and eat the crispy remains which I love, but unfortunately not very presentable!)

Monday, August 21, 2006

kung pao chicken


There are so many variations of this spicy, salty, sweet yet sour dish. I've tasted about as many good versions as bad versions. According to my Wei-Chuan cookbook, Kung Pao chicken originated in the Szechwan region of China, where the use of chili peppers is apparent in many dishes. Traditionally, the main ingredients are chicken, peanuts, and chili peppers. Chicken is first cooked quickly in a fragrant oil which has been infused with aromatic ingredients such as the chili peppers, then mixed briefly with a sugary, vinegary, salty sauce. Peanuts are tossed in at the last minute before plating, and served with plenty of rice to complement the complex flavors of this dish. Modern day restaurants often throw in other ingredients such as bell peppers, carrots, mushrooms, or bamboo. Although the taste might be good, I'm still a purist when it comes to this dish, and I prefer mine without the addition of any extra vegetables (If I wanted my veggies benefits, I'd make another dish!). The worst version of Kung Pao Chicken came from this fast food Chinese restaurant that served it with peppers, baby corn, water chestnuts, canned bamboo, mushrooms, and carrots in an overly salty brown sauce with about 2 peanuts thrown in. Maybe they wanted to be cheap and stretch the cost of the peanuts? Anyway, the recipe below is from my Wei-Chuan cookbook, although I did not measure the ingredients, rather eyeballed everything, tasting my spatula and adjusting as necessary. My new bag of chili peppers were not as spicy as my old bag, so next time I'll use more of it since I like a spicier dish.

Kung Pao Chicken
Adapted from Wei-Chuan's Chinese Rice and Noodles

2/3 lb (300g) boneless chicken
Marinade:
2/3 Tbsp each of soy sauce and wine
1 Tbsp Cornstarch

Aromatics to infuse oil
12 pieces dried chili peppers
1 tsp grated ginger
1 Tbsp minced green onion (white sections)

Sauce:
2 Tbsp each of water and soy sauce
2 tsp sugar
1 tsp each of vinegar and cornstarch
1/2 tsp sesame oil

Garnish:
4 Tbsp roasted peanuts
1/2 cup chopped green onions (green section)

Directions:
1. Cut chicken in cubes and pour in the marinade.
2. Heat wok to very hot, add 1 Tbsp or so oil to stir fry aromatics. Add chicken and stir fry until cooked. Add in the sauce until thickened. Mix in the garnish and pour on plate.

Wednesday, August 16, 2006

Egg Tarts


Previously I posted a recipe for citrus lime tarts, which looks similar to these egg tarts. Of course, one bite will instantly tell you the difference since the latter is a smooth, sweet filling instead of a zesty, tart filling with an edgy bite. I like them both, but when deciding which one to make to serve for the company, the egg tarts are probably a safer bet since most people are familiar with these since they are often served at dim sum and can also be found in most asian bakeries. I used pretty much the same skin as that from the citrus lime tarts, only substituting 2 Tbsp butter for the shortening in the oil dough (just because I wanted a slight buttery taste and a little color to the skin). Next time, however, I might just be lazy and do a simple pie tart skin since it takes way less time and still tastes delicious. Anyway, here's the recipe for the filling, which I initially got from Ellen Blonder in her Dim Sum book, but have changed the recipe and methods slightly for my own tastes.

Filling for Egg Tarts
enough filling for about 18-20 mini tarts

Ingredients:
2 eggs
1/2 cup milk
1/2 cup sugar
1/4 tsp vanilla

Directions:
1. In a small pan over medium heat, dissolve the sugar in the milk. Remove from heat and let rest until warm
2. Beat 2 eggs with the vanilla and add to the milk solution.
3. Pass the filling through a strainer and pour into tart cups that have been lined with the skin doughs
4. Bake at 325 F for 30-35 minutes

Sunday, August 13, 2006

Detailed Recipe for Mooncakes


Although Mooncake festival isn't for a while, my first batch of mooncakes came out this week. Since my Fiance's family was preparing for a dinner party at their house, I wanted to help out by making some snacks. I really wanted to try making a few big ones using a new, bigger mould that I purchased, but I thought the small ones would be more appropriate for a dinner party since each guest could grab a few. Previously I had written a post about these Cantonese mooncakes, but I thought I'd share my two cents this time and post the recipe and steps that I used (which I got from Jo and changed it ever so slightly mainly to scale to how many pieces I wanted). This turned out to be rather tasty as well as presentable, so many thanks to Jo for her help! Word of caution, although the ingredients are very common and the dough easy to make, the most difficult part comes from wrapping the mooncakes, which unfortunately cannot be well explained in words (well, at least not by me anyway). Please practice a few times before presenting it as a gift because the first few may turn out a little distored (although equally delicious!) Another piece of wisdom, which may go against most rules in baked goods, is: do not serve until 2-3 days after making it, for it will take some time for the mooncake skin to soften and have the traditional glowing appeal. Personally, I like mine best straight out of the oven since I prefer a slight crunch to the skin (or maybe because the smell of mooncakes baking in the oven extinguishes any of my will power to wait 2-3 days to taste test one!) At any rate, these are truly worth the time and effort to make. Just don't make any plans for a few hours that day!

Mini Cantonese Style Mooncakes
Makes 50 small mooncakes

Ingredients:
Skin:
450 grams flour
15 grams cornstarch
135 grams oil
345 grams syrup (recipe follows)
1 tsp baking soda

Filling:
Any type (red bean, mixed nuts, lotus paste, salty eggs, etc).

Egg glaze:
2 egg yolks, 2 tsp water, 1 Tbsp oil, mixed together

Directions:


1. In a double boiler, heat together oil, syrup, and baking soda. Remove and let cool
2. Sift together flour and cornstarch. Pour in the syrup and mix the dough together. The consistency of the dough will resemble that of a firm cookie dough. Wrap with saran wrap and let rest at room temperature for 10-18 hours.
3. Take a portion of the dough and use your fingers to shape the skin into a disk. Roll a piece of the filling into a ball and gently press the filling against the skin. Try to push the skin up and around the filling, making sure to enclose the entire filling. Note, a little bit of water may be used to help spread the skin a little.
4. Flour your hands and roll the piece to smooth out the ball. Place in the mould and press firmly to ensure that the patterns will show. Bang on a counter to dislodge the mooncake.
5. Bake for 12 minutes in a 350 F degree oven. Remove and let cool for 5 minutes before applying the egg glaze. Return to oven and bake again for about 12-15 minutes.
6. Remove to baking sheet for 2-3 days before transferring to a container to be served.

Recipe for Syrup:
Golden Syrup:
600 g sugar
500 g water
lemon slices

Use high heat to dissolve sugar and water. Then add the lemon slices and boil on low heat until thick and golden. Then add 2 tbsp molasses and 1 tsp vanilla. Strain through a sieve and transfer to a container. Total time should be between 1 and 1.5 hours.

Wednesday, August 09, 2006

pizza


Pizza, the default dinner of many of people. And why not? One bite of it will get you points from all sections of the food group(well, if you order the toppings wisely anyway). While ordering pizza can be really enjoyable and affordable (especially during the middle of the work week when pizza restaurants offer awesome deals), making your own pizza can be an enjoyable and rewarding experience. The crust recipe is pretty standard compared to the water/flour/yeast ratio of some my other yeast bread recipes, only with the addition of olive oil for taste. It actually took less time than I thought to make! The only difficult part was the kneading process since I didn't have access to my kitchenAid mixture, but it was a great arm workout! While the dough started to rise, I marinated and grilled some chicken, roasted some eggplants, and sauted some onions. I also chopped up some other toppings like peppers and tomatoes. About an hour later, the dough more than doubled from the original size, so my sister and I each grabbed half the dough and had a blast trying to shape it by tossing it in the air. It wasn't as hard to toss as I thought, and ours actually turned out pretty round looking! We brushed the crush with some garlic oil, spread some pizza sauce on the dough, dressed it with all the cheese and toppings, and popped it in the hot oven for about 10-13 minutes. There's definately a difference in taste between homemade and the ones from the restaurants...homemade tasted cleaner and didn't leave me with the greasy, heavy feel that I usually get after I eat pizza. One day, I might invest in a pizza stone, which will make the dough extra crispy on the bottom. For now, I'll just continue to do what I did today...to use a piece of aluminum foil and place it directly on the rack. Good enough for now, and best part yet, there's way more than enough for lunch tomorrow!

Pizza Dough
makes two 12 inch pizza crusts
1 tsp sugar
1/2 tsp salt
1 packet of instant yeast
1 cup warm water
2 Tbsp olive oil
3 cups flour

Directions:
1. Dissolve sugar and yeast in warm water and let sit for 10 minutes, until yeast becomes foamy, indicating that it's active.
2. Mix together the salt, 1 Tbsp of olive oil, 2 and 1/2 cup of flour, and the yeast mixture in a large bowl.
3. Turn onto a slightly floured board and start kneading, incorporating the extra 1/2 of flour as needed. More or less flour may be needed to get the correct consistency. Knead for about 10 minutes. The dough should be soft but not sticky.
4. Rub the other 1 Tbsp of olive oil over the dough, transfer to a bowl and let rest in a warm environment until doubled in size, about 1 hour.
5. Divide the dough in half and knead each briefly. Shape into a round disc about 12 inches in diameter.
6. Preheat oven to 500 F. After topping the pizza with desired toppings, bake for 10-13 minutes.

Sunday, August 06, 2006

Dumplings


Ever since I can remember eating (which is pretty much ever since I started remember anything), I've remembered eating dumplings. My parents, from the Northern part of China where the use of flour is abundant compared to other parts of China, love making dumplings the traditional way. This includes mixing your own dough, rolling out each dough into a thin, circular shape, and wrapping the dough around perfectly seasoned mixture of ground pork, nappa cabbage, and herbs and spices. Even with the modern conveniences of the store bought wrappers and frozen dumplings, my family still prefer the taste and the family bonding experience that comes from the process of making and wrapping the dumplings. Even though I now live on my own, I still find the time to make my own dumplings. There's just something theraputic and comforting about kneading, rolling, and wrapping them. I can almost imagine my family being together and laughing and talking with me as I stand in my own kitchen and prepare this. Maybe this sweet nostalgia which makes it more memorable also makes them dumplings taste better? In any case, although the process takes awhile, it's definately worth it because to me, this is the ultimate comfort, not only because it tastes good but also because of the happiness it brings when I make it.

Dumplings are one of the dishes that I don't have a written recipe for since I learned it from my parents who use a pinch of this, a splash of that, and adjust everything by tasting as they go. For the dough, I've had to experiment until I came up with the right balance of water to flour. The ratio of flour to water is roughly 3 cups flour to 1 cup water, of course each time may be slightly different due to the humidity of the air, type of flour used, how moist your hands are, etc. For boiled dumplings, use cold water, and for panfried dumplings (or Guo Tie), hot water is used to first partially cook the dough, resulting in a more chewy texture. After giving the dough a rest for about 30 minutes, it is ready for rolling, shaping, folding, cooking, and finally, eating!!
Enjoy!

Banana Bread


What do you do with overly ripe bananas that no one wants to eat?
Put it to use in banana bread, of course! The extra ripeness of bananas sweetens and adds extra moisture. There are plenty of recipes for banana bread, and honestly, most are quite good. It's quite difficult to mess up banana bread, since this is a quick bread recipe and doesn't require resting, proofing, or worrying about adding too much liquids to the dough (well, not as much as traditional breads, anyway). Since I am making this for my family, I wanted to have a healthy version of banana bread, meaning lower fat and slightly less sweet than the type of banana bread I would bring in for my western friends (since they're used to more buttery tasting and sweeter, almost cake like version). So here is my version, which I adapted from Allrecipes and changed it slightly to accommodate the tastes that my family enjoys.

Banana Bread

2 cups all purpose flour
1/2 cup sugar
2 eggs
2 Tbsp oil
1/4 cup water
1 tsp baking powder
1/2 tsp baking soda
4 overly riped bananas
1/2 cup chopped walnuts
1/4 cup raisins
splash of vanilla, pinch of salt and cinnamon

Directions:
1. Preheat oven to 350 F
2. Mash up bananas, beat in eggs, oil, water, vanilla and sugar
3. sift together flour, salt, cinnamon, baking soda and baking powder
4. Mix together (2) and (3) and stir in the walnuts and raisins.
5. Pour into an 8 by 5 inch loaf pan, and bake for 50-60 minutes until top is brown, cracked, and middle is cooked.
6. Let cool on rack and slice only when cooled.


*note*
for a slightly richer taste, substitute the oil with butter, and dot the top of the bread with butter before baking for a crisper top

Friday, August 04, 2006

When you need an excuse to procrastinate


Phone rings...it's my boy. Here's how the conversation went:
Fiance: Hey, what are you doing?
Me: I'm baking!
Fiance: So I guess you're ready for your final exam this afternoon?
Me: No, I just needed a break from studying
Fiance: That's so cute, you bake when you need a break! I'd go play video games or watch TV.

So yeah, I have a final this afternoon (in exactly 4 hours as I type this). But....I have had the strongest urge to bake something all week! I've been good about it but I can't stand it any longer. Plus, I have good reason to bake...I need to finish off 1 egg and most of a lime before I leave for vacation tomorrow. Yeah yeah, I know I could easily crack an egg and scramble it, and cut up the limes and stick it in my tea, but I love citrus flavored tarts, and I figure I could use this opportunity to fix me up a little sweet and tart snack! So here I go!

Normally when I make lemon or lime tarts, I use a shortbread base, which is basically butter, flour, sugar and salt. However, I've been itching to try the flaky skin recipe that I found in Florence Lin's book, where she describes her methods to make the skin of egg tarts. Now, I have a basic flaky skin recipe that I've been using forever, but the methods she presented here were different, so I thought I'd go along. The last time I attempted to make a flaky skin egg custard tart (similar to the ones found in dim sum places), I followed a recipe which yielded in tough, leathery skin which was salvageable only by the extra buttery taste. Florence's recipe, however, uses only shortening and resulted in many flaky, beautiful layers (which my 3.2 megapixel camera does not do justice). Next time, I might try butter flavored shortening, or substituting some butter for the shortening in the inside layer to get that lovely, buttery aroma. Anyhow, so why did I mix and match the skins and fillings from two totally different recipes? Well, I love the flaky skin the chinese pastry, but absolutely love the refreshing taste of citrus. So here it is for your enjoyment. The below is the recipe that I used for the filling, which yielded 10 mini tarts.


Citrus Lime Filling:
1 egg
1/4 cup fresh squeezed lime juice (I used 1 large lime)
1/4 cup sugar
1 Tbsp flour
zest of the lime

Directions:
Beat together strain to get rid of clumps. Pour into the tarts, which have been lined with the pastry skin. Bake at 325 for 20 minutes.

Flaky Skin
Adapted from Florence Lin's Complete Noodle Book
(I halved the portions that she used)
Outer Skin:
1 Cup All Purpose Flour
1 Tbsp shortening
1/3 cup water

Inner Skin:
3/4 Cup All Purpose Flour
6 Tbsp Shortening

Directions:
1. For each type of dough, mix ingredients, wrap, and put in refrigerator for 30 minutes
2. Wrap the entire outer skin around the inner dough, and flatten to a disc.
3. Roll it out to a 8 by 12 sheet, and fold in thirds to get a 4 by 8 sheet. Roll this sheet out again into an 8 by 12 sheet and fold in thirds again. Wrap and place in refrigerator to rest. (This is when I started making the filling)
4. Roll out into a 16 by 16 square. Use a cutter to cut circles to fill your tarts.

So I used about half of this dough for the tarts, the other half I made some pastries and filled it with traditional red bean. Then I realized since I used the last of my egg, I had nothing to glaze it with (no milk, no cream, no nothing!), so my flower pastries look rather plain, instead of glossy and lightly browned. It still tasted good in my stomach.

Oh boy, where did the time go. Anyone want to help me study?