Sunday, July 30, 2006

Green is the Theme

When my parents and sister came to visit me last week, they brought a bunch of fruits and vegetables from their garden. (buy a bunch, I mean about 30 peaches, 10 cucumbers, and lots of other yummys). Well, as of today, there is officially only 3 peaches left in the refrigerature, 2 cucumbers, and a bundle of long beans. (Quick calculation, what's 27 peaches divided over 6 days?....lots of peach consumption for this one female!) Anyway, I decided to use the rest of the cucumbers and long beans for dinner and turn it into a healthy, green theme. Didn't really follow any recipe, just threw together what I had, and came up with a beef and long bean stir fry, and a pork and crab meat stuffed cucumber dish.


For the stir fry, I first marinated the meat, then oil blanched it briefly before stir frying it with the long beans. I was debating whether or not to do this step, but I was in the mood for a slightly crisped texture of beef.


The filling is composed of ground pork, crab meat, and the usual spices and herbs like ginger, green onions, salt, pepper, wine, sugar, and sesame oil. After stuffing the cucumbers, I topped each one with shreds of sliced ham. Into the steamer it went for about 15 minutes. Afterwards, I poured off the juice that accumulated and thickened it in a pan with a little cornstarch/water solution.

So NOW, I am almost done with everything my parents brought up for me...except those 3 peaches, which are waiting for me tomorrow.

Saturday, July 29, 2006

Finally got my Nutella Fix!


After reading so many post about nutella lately, I couldn't take it anymore! I just had to use my jar of nutella and do something with it! (Short of eating it straight out of the jar with a big spoon...which by the way is also very good!). Since I love making and eating these 2 layer skinned Chinese pastries (See previous blog about making their skin), I thought, "why not put some nutella-walnut filling in them?" Wow, they were good! It's quite a nice change from the usual red or green bean paste filling, and the addition of walnuts offsets the sweetness of the nutella and adds a crunchy suprise with each bite. As you can see from my pictures below, they didn't last long...each bite was truly delicious, and I have finally satisfied by huge nutella craving!

Kao Fu (Braise Wheat Gluten)


I first had this dish at my fiance's family's house. His family is from Shanghai, and this is suppose to be a pretty common Shanghai dish. Kao fu, or wheat gluten, can be purchased in either frozen form or the dried form. I opted for the dried form, which had to be rehydrated in water prior to deep frying. At first I was curious why deep frying is necessary, but it is needed in order to give that bouncy, resilient texture that can withstand the braising time. Without this step, the texture may become soggy, fall apart, and lack that certain body.
Certainly my version cannot compare to my fiance's mother's version, it is still very good, as I have used the recipe from my trusted cookbook author, Florence Lin. Enjoy!


Recipe for Kao Fu
Adapted from Florence Lin's Regional Cooking

Ingredients:
2 oz dried wheat gluten
1/2 dried wood ear
30 stems or dried lily buds
2 large shitake mushrooms

1 star anise
1/4 cup soy sauce
1 Tbsp sugar
1 tsp seasame oil
oil for deep frying

Directions:
1. Soak gluten in boiling water until soft. Sqeeze dry and cut into cubes. Should make about 2 cups
2. Soak mushrooms in warm water for 30 minutes. Discard stems and cut into 4 pieces, reserving the liquid. Rehydrate the wood ears and lily buds for 30 minutes and drain.
3. Heat oil to 350 F. Deep fry the gluten until golden brown and crispy. Drain on paper towels.
4. Using the reserved mushroom liquid, add enough water to make 2 cups of liquid. Pour this solution into a pot along with the rest of the ingredients except seasame oil. Bring to boil, then reduce to simmer. Braise for about 1 hour until there is little liquid left. Sprinkle on the seasame oil and either serve hot or cold.

*Edit*
Picture of the dried wheat gluten package.

Saturday, July 22, 2006

Who said alcohol doesn't solve problems?


While I don't advocate excessive drinking, I do believe there are some benefits from alcohol. And if alcohol can be made to taste good, well, then bottoms up!
One of the most common Chinese alcohol drinks is rice wine soup. I remember first tasting this as a kid and I hated it! Of course, I was only seven at the time and the sweet, fermenty alcoholic taste was foreign to me. Since then, I have grown quite fond of this sweet concoction and always have a supply ready in the fridge so that when I need a little boost of happiness, I can reach for the fridge and cook up some sweet wine soup.

Normally I boil some homemade tang yuan (glutinous rice balls filled with any choice of sweet fillings) into the soup, along with an egg and sugar. Today I realized that I had a peach in the fridge that looked really lonely and I thought, "why not?" peaches and wine go together, right? Indeed they do make a perfect match.

Thursday, July 20, 2006

Simplicity, the delicious taste of easy to make foods

As much as I love trying out new recipes, sometimes I just don't have time to carefully measure out the ingredients and study the techniques of each new dish. That's why people have their own "default" meals, quick ingredients that can be thrown together with minimal preparation without any compromise on taste. Here are some of my default, simple dishes.


Panini Sandwiches.

Quite possibly the easiest, most satisfying sandwhiches. Who doesn't love the combination of toasty bread, enclosing a mouthful of warm, thinly sliced turkey and roast beef meats, the sweet yet slightly tart suprise of the tomato slices, all coated richly with the melted gooey goodness of cheddar cheese? Using the grill pan that I initially bought for grilling meats, I have discovered a new joy of using that tool as a panini press to make the indentation marks for sandwhiches. It tastes only 5 minutes to warm up the grill and about 5 minutes to grill the sandwhich. Each grill pan will need different times, of course, but once you hear the sizzle of the cheese as it slides over the meat and bread and hits the hot grill, you know your wonderful sandwich is only seconds away from being devoured!


Fried Rice


Which asian person does not know how to make fried rice? Every asian that I've met claims that he/she or his/her mom makes the best fried rice. I'm not competiting for the best fried rice, as I know that everyone's standards are different (trust me, my friends have actually had a fried rice contest and no one will ever say that someone else's fried rice is better than their own!) Everyone has a different version: some with soy sauce, others with curry, some add expensive ingredients like seafood while others toss in random leftovers from the fridge. I like mine simply with some ham, edamame beans, eggs, and salt. Too simple, you might say? Well, read the title of this post again :)


Cabbage stir fry

Sometimes a simple veggie stir fry is comfort food enough. With some dried red peppers to bring out some heat, the natural flavor of the cabbage shines through and reveals the its own unique taste.

So there ya go. Simple foods I eat on a busy day.

Wednesday, July 19, 2006

Parmesan chicken bake


Parmesan chicken pasta bake....quite possibly the perfect dish to cook when I know I'll be busy for a few days since the quantity is easily adjusted and reheats reasonably well for leftovers. I've been making this wonderful italian style dish since I learned the recipe from my home economics class in 9th grade. Even my sister who doesn't usually like the flavor of cheese enjoys this classic. The heavenly aroma of parmesan released in the air while pan frying the breading seriously makes my makes my knees weak. (Er, actually, lots of things makes my knees weak, okay, anything food related will have that effect but bear with my dreamy description since it's my blog after all) After a brief shallow frying to brown the breading, the chicken is baked with the pre-boiled pasta, gently touched with marinara sauce, and finished in the oven to a crisp, yet tender texture.

This recipe is very forgiving, in that exact measurements are not needed and can be approximated if you're too lazy to weigh out everything!

Ingredients:
10 oz (roughly 300 g) skinless chicken breast
2 eggs, beaten
equal portions of bread crumbs and grated parmesan cheese (I used about a 1/2 each)
pasta noodles, any type
1/2 cup marinara sauce, either store bough or homemade
4 tbsp oil

Directions:
1. Slice the chicken breast into thin pieces to your liking. This is easiest when the chicken breast has been partially frozen first.
2. Beat the 2 eggs together in a bowl and put aside
3. Mix the bread crumbs with the parmesan cheese and put it on a plate next to the beaten eggs
4. Using chopsticks, pick up one slice of chicken, dredge it in the bread/cheese mixture, dip it into the egg mixture, and back into the bread/cheese mixture. Repeat with remaining slices.
5. Heat a pan to medium/high, pour about 1 tsbp oil evenly into pan. Place a chicken piece even on it and let it sizzle and brown for about 2 minutes each side. (Do not move the chicken once you have placed it on the pan until it has browned, or else the coating may come off!). Drain on paper towels. Repeat with remaining pieces using more oil when needed.
6. Meanwhile, boil some pasta noodles until almost cooked. Preheat oven to 350 F.
7. Pour a thin layer of sauce on the bottom of a pan. Layer the cooked noodles over the sauce. Place chicken pieces over the noodles. If desired, place more sauce on top and sprinkle with leftover bread/cheese mixture. You may top with other types of cheese if you are a cheese fan!
8. Bake for 20 minutes until bubbly and hot!

Sunday, July 16, 2006

Taro Puffs....kinda


One of my favorite dish to order at any dim sum place is Taro Puffs. The skin is made from mashed taro roots, enclosing tiny bits of pork, shitake mushrooms, and other delicate flavors. When deep fried, the skin expands slightly to create a beehive like texture; a crisp exterior that gently protects the light, fluffy, almost cottony-cream texture of the mashed taros.
Now, with that said, I decided to embark on another deep fry mission to satisfy my ever so greedy taste buds. After reading the successful reviews from many of my blog pals, I decided to try for myself. Again, there are so many recipes out there; some calls for mixing mung beans with the taro, some suggests using boiling water to first cook the wheat starch before mixing in with the taro, others suggests using cornstarch and tap water. Faced with too many choices, I decided to use the one from my trusted Dim Sum book by Ellen Blonder. My only problem....uh oh, I only had a little bit of shortening left (Which I didn't realize until I was done steaming the taro). So I modified the recipe by trying to scale it down, unfortunately my results, although very tasty, was not the end product I had hoped to achieve and left much to be desired.
I won't post the recipe because I probably won't be using this one again, as I am hoping to find a different source to fulfill my taro puff ideals. However, here are the some pictures that I took for your enjoyment!

Taro puffs ready to be fried up! They look like cut little rocks!


Finished and ready to be eaten. Notice how the skin isn't as flaky and beehive-ish as those served in restaurants? Argh!


I would love to hear your suggestions on how to improve this. My gut feeling is that I need to increase the shortening. I also used those baby taro that are about 8 cm long instead of the big ones just because I couldn't find the big ones. Maybe next time I'll use the big ones and see if they work better. In the meantime, I'll finish eating these because looks aside, these are still rather delicious!

Saturday, July 15, 2006

deep fry saturday! Introducing....deep fried asian cruellers


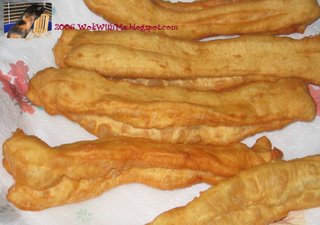
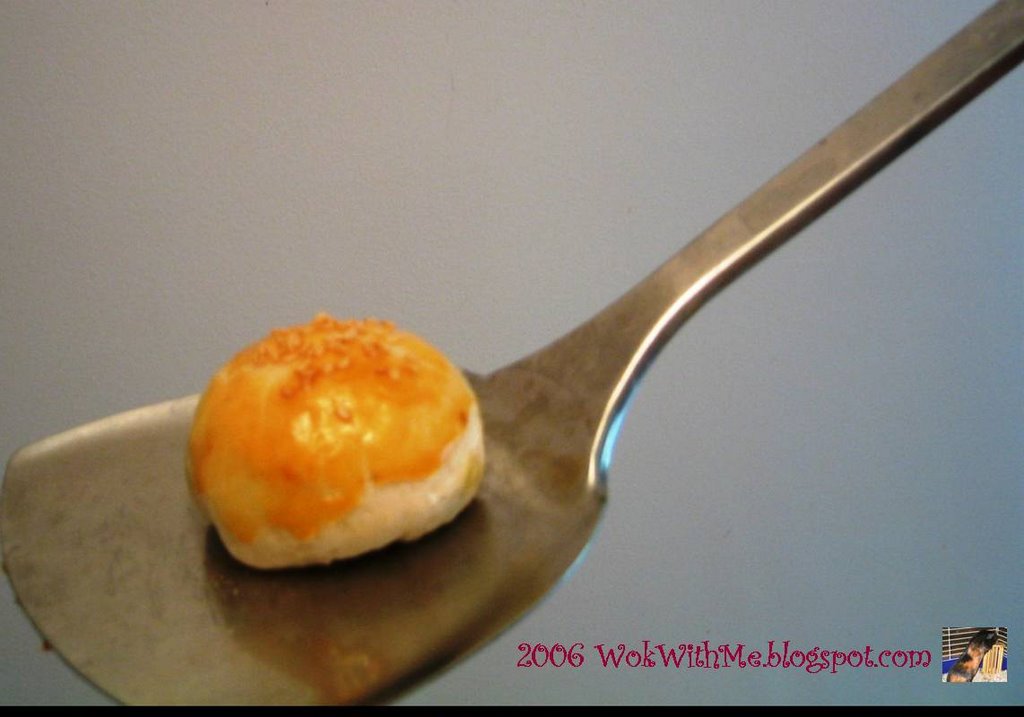
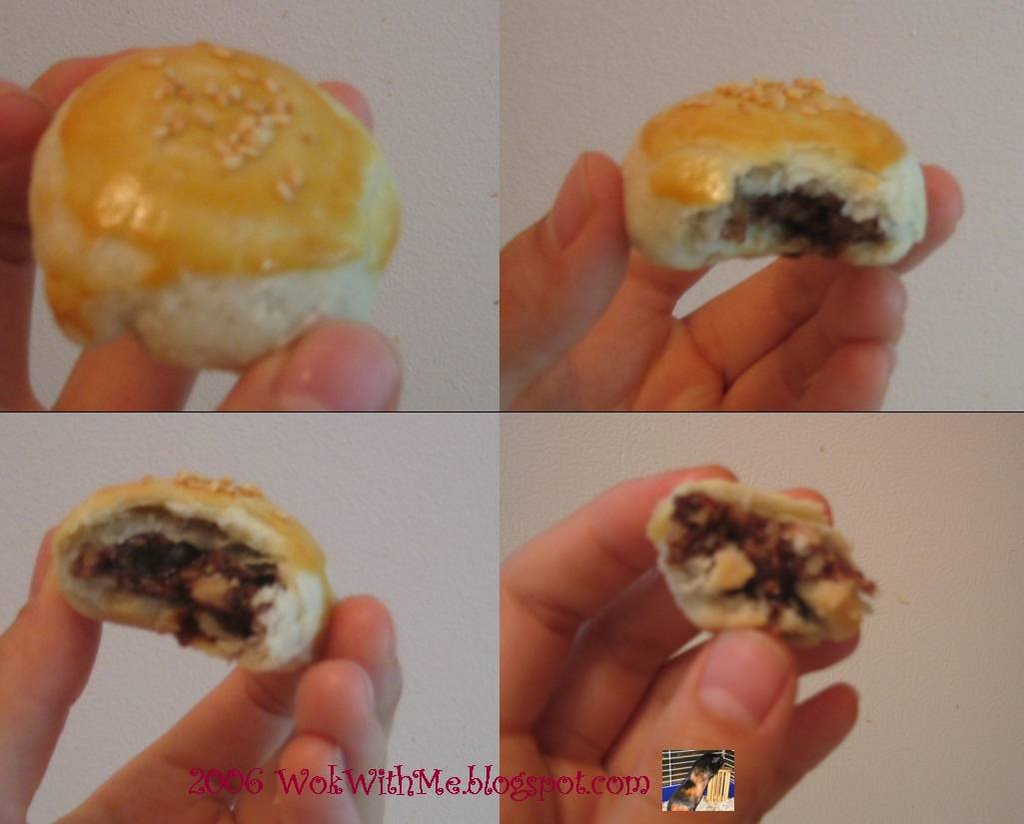
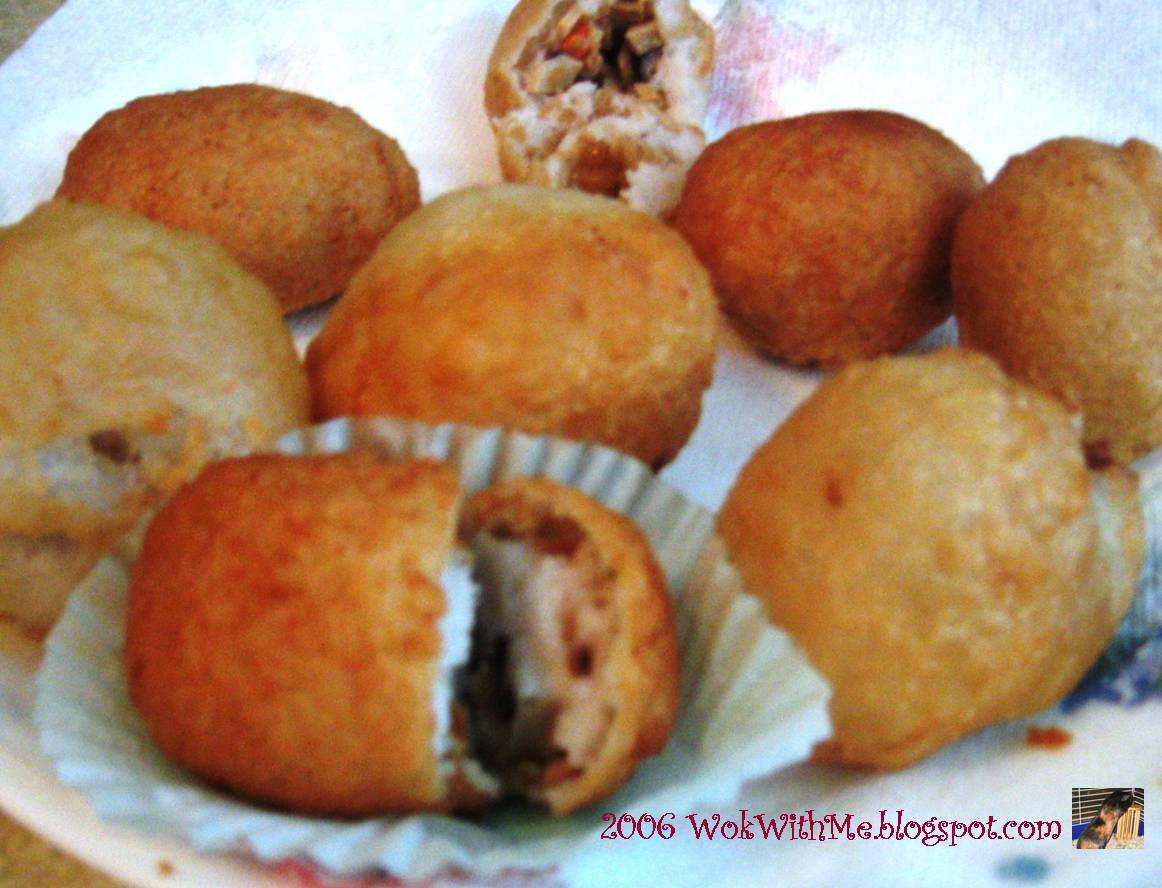
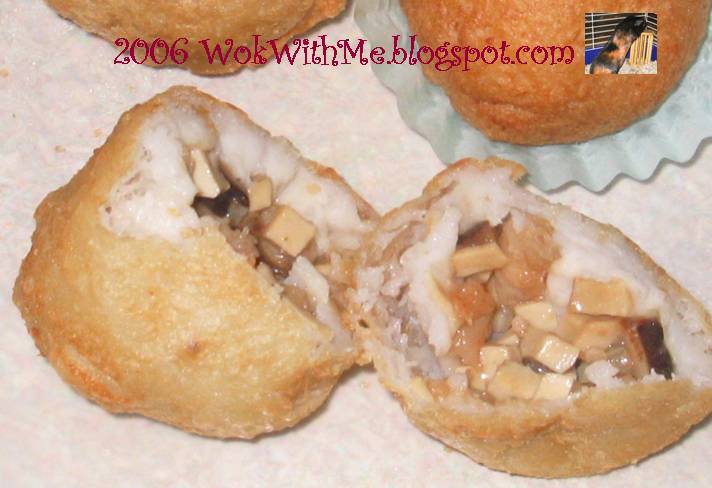
Crisp, chewy, and just plain delicious. That's how I would describe these asian treats. The chinese name for these is You Tiao, but they go by many other names such as Yu Tiao, Yu Char Kway, etc, depending on where you're from. Although these are sold frozen in any asian store, nothing beats fresh from the fryer You Tiao, which is why my mission for today was to make these.
Since I'm an avid fan of asian cookbooks, I gathered about 5 different recipes from my cookbooks as well as a recipe from TT's site. Now the headache part comes in...which do I test first? Armed with a pencil and calculator, I begin comparing the ratio of flour/water/leavening agent from all of my sources. Pretty similar...I thought, so why not pick one that scales the easiest since I live alone. The important thing to avoid is to add any extra flour to the mixture. The dough will be sticky, and nearly impossible to use a rolling pin to roll out to the desired thickness. Instead, my creative approach was to spray a ziplock bag to put the dough in, and place a heavy object (a cutting board in my case) to rest on top of the dough. While the dough sits and rest, I went to the gym as a motivation to get back so I could eat these crispy goodness! (Yes, food is my best motivator to go to the gym, otherwise I'd be lazy and eat all day!). By the time I got back, the dough was thin enough so all I had to do was cut off the sides of the bag to get to the dough. So here's the following recipe that I picked, along with my personal notes and pictures taken during the process:

You Tiao
Adapted from Chinese Snacks, Wei-Chuan's Cookbook
makes about 10 seven inch pieces.

Ingredients:
260 g bread flour (about 2 cups)
175 mL water (about 2/3 cup)
1 tsp baking powder
2/3 tsp baking soda
1/2 tsp alum
1/2 tsp salt

Directions:
1. Mix water with baking powder, baking soda, alum, and salt until dissolved. Pour this solution in the flour and mix until combined. The mixture will be sticky so make sure to wet your hands periodically to mix.
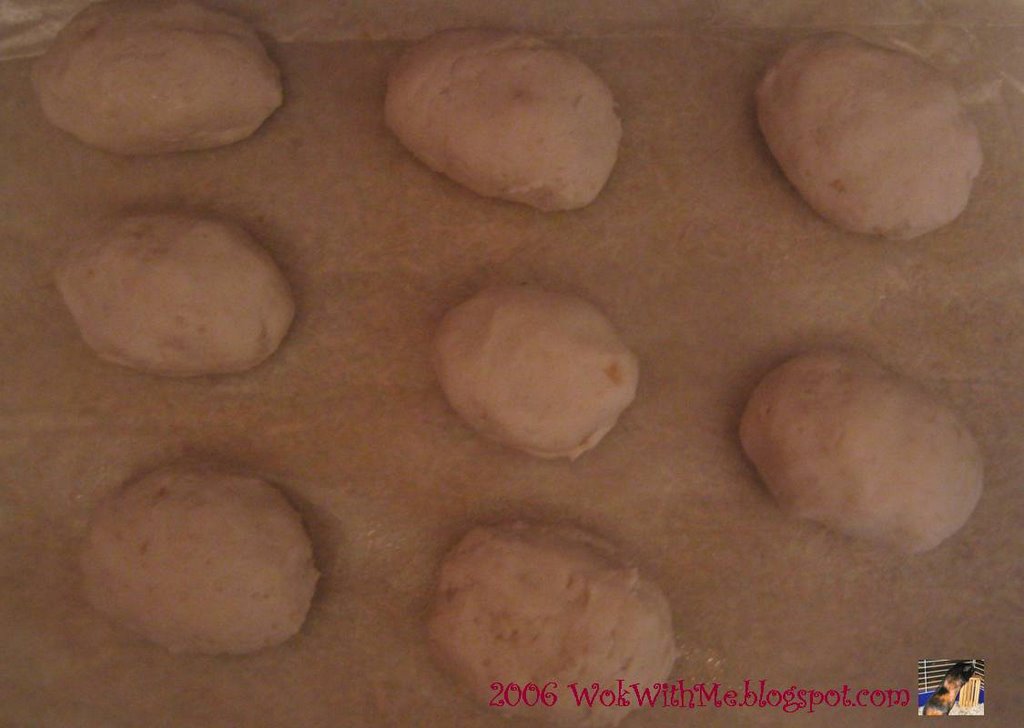
2. Let this sit for about 30 minutes and gently use your fingers to knead until dough is more elastic.
3. Spray a plastic ziploc bag with oil and place the dough in the bag. Place a heavy object on top to flatten the dough. Let sit for 4 hours.
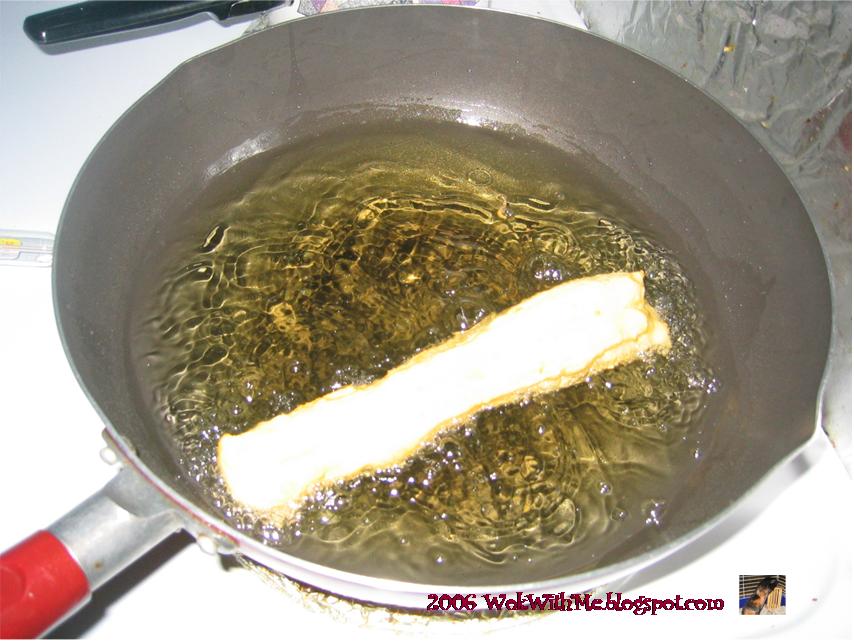
4. Heat enough oil for deep frying to about 350-375 F.
5. Use scissors to cut a side of the zip loc bag to open. Cut dough in half, and slice each half to ten equal pieces, about 3/4 inch wide. Stack two pieces together and use the back of a knife to press the middle to make an indentation.


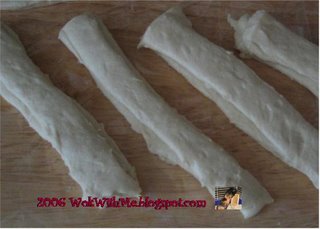
6. Gently stretch each piece and drop it into the hot oil. Fry until golden, making sure to turn the cruellers constantly, about 1-2 minutes each.


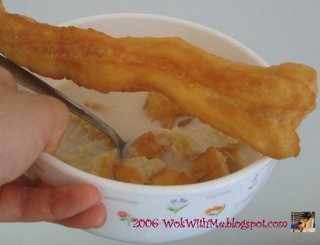
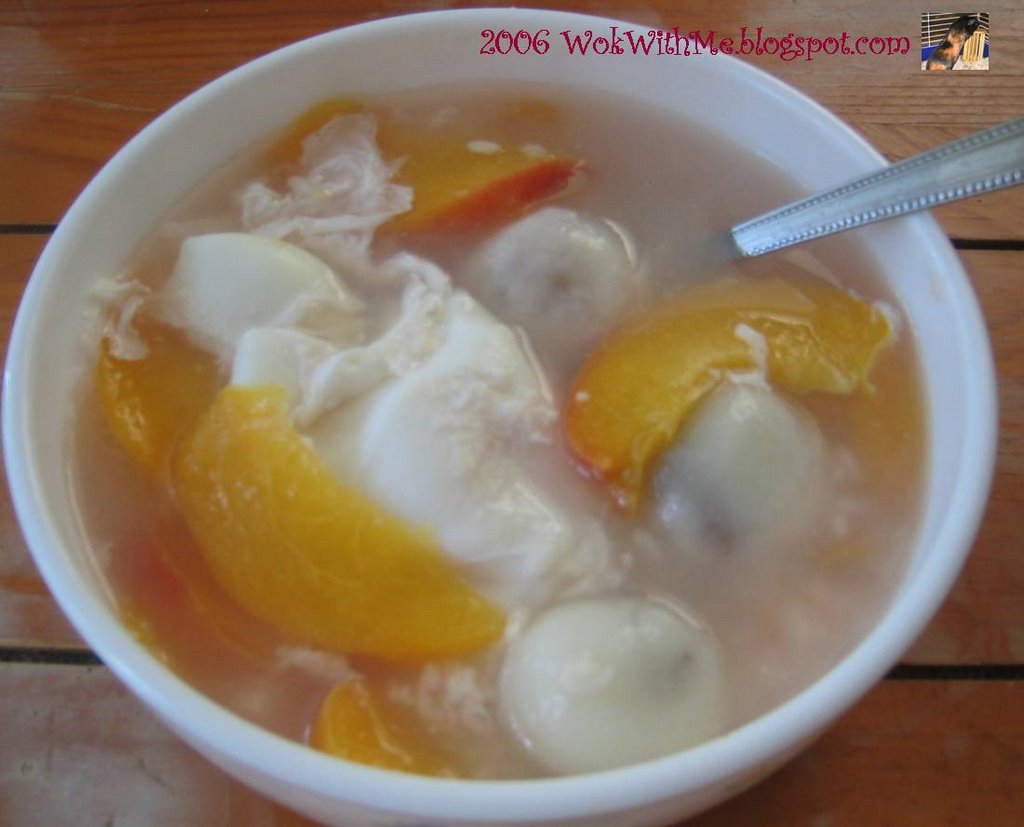
Enjoy best fresh from the fryer! I like mine mixed with sweet soymilk

Friday, July 14, 2006

cantonese style mooncakes

I made these last year, a little too late for mooncake festival as I didn't get my mooncake moulds until later. The process can be pretty involved if you choose to make everything from scratch, such as the sugar syrup and fillings. If you wish to buy premade syrup and filling, the process will be a lot faster, however, I think that it's probably worth making your own if you're going to go through the prcoess of making these in the first place, since the taste will be a lot better.


I got the recipe from Jo at http://www.jodelibakery.netfirms.com/ and it is a success! I had to make my own syrup since I could not find any. The recipe below is for the syrup solution.

Golden Syrup:
600 g sugar
500 g water
A few lemon slices
2 Tbsp molasses
vanilla

Directions:
Boil the sugar and water on low heat until thick and golden, then add 2 tbsp molasses and 1 tsp vanilla.

flaky skin mooncakes

I made these last year around Thanksgiving. These pictures are mooncakes with a flaky skin, achieved by rolling two different types of dough together.


I made two different types of filling for these: one with the traditional red bean paste, the other filled with walnuts and sugar. I've tried many different recipes to achieve the flaky skin and have discovered that the weather, location, and brand of flour really influences the outcome, therefore, the recipe for the skin that I have is merely a guide, as the best recipe for success comes through experience of knowing how the dough should feel at each stage.
makes 50-60 little moon cake bing

Water Dough
4 cups flour
3 Tablespoon Sugar
1 tsp salt
1 cup shortening
1 cup cold water


Oil Dough
2 cups four
1 cup shortening

Directions
Sift dry ingredients for water dough. Cut in shortening and mix in water until just combined. Gently knead until the dough comes together. Saran wrap and let rest for 1 hour in refrigerator

Cut in shortening for oil dough into flour. Mix until combined but do not knead. Wrap in saran wrap and refrigerate until ready to use

Wrap each portion of the oil dough in the water dough and follow instructions for the recipe using this dough. Brush the top with a egg wash made with beaten egg yolks and a little milk. Bake for 25 minutes at 350 until cooked.

My Blog is Born

There's a guinea pig in the kitchen....and that guinea pig is me!

I've always enjoyed cooking and baking. In fact, my mom jokes that I learned how to use fold dumplings when I was 18 months old! I highly doubt her accuracy and I'm sure there's a slight exaggeration to show her pride (as all mom's are probably guilty of :)). I currently live on my own so there's plently of opportunity for me to be adventurous with my kitchen experiments. I hope to share my journey in my kitchen with all my food loving friends, and hope to hear back comments and suggestions as to how to improve my own techniques.